
|
One of the most common requests I get teaching yoga asana is to help my students create more mobility in the hips. Among other things, tightness in the hips and legs can contribute to difficulty moving and low back pain. Here’s a sequence for the hips I call “around the world” (a call-back to a basketball game I used to play with my big brother as a child). This mini-sequence gets into all four sides of the hip. It's a perfect sequence for beginners and advanced practitioners alike to bring more awareness to the lower body and start to alleviate lower body tightness, while being fairly accessible as all of the poses are supine (on the back). Enjoy your journey "around the world" with your hips! Supta Padangustasana 1 (Supine Hand to Big Toe Pose 1): 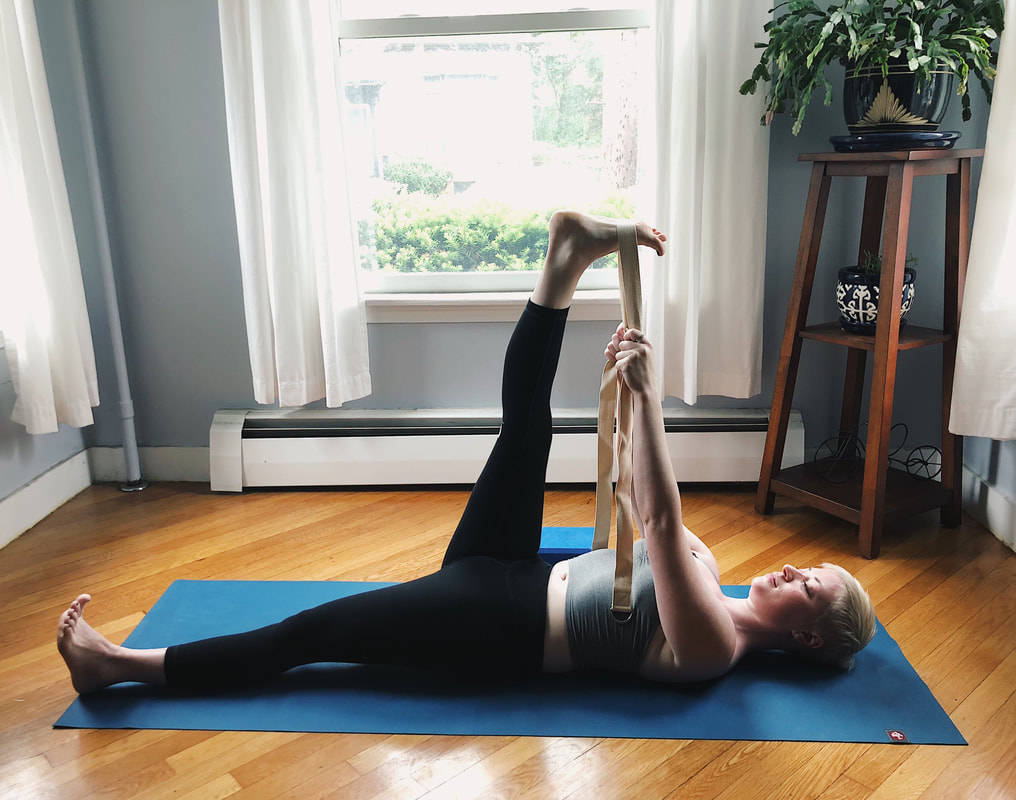 Photo by Omar Robinson Photo by Omar Robinson * This is one of my most used poses. I almost always begin every private session I teach have with this pose. It allows for the opening of the back of the thigh/hamstring muscles while keeping the lower back in a safe position on the floor. Have a strap nearby and lay on the floor in a supine tadasana - feet about hips width apart, knees and toes actively turning to the ceiling. Draw the right knee towards the chest and loop the middle of the strap along the ball of the foot (the area just above the arch but below the toes) and straighten the right leg towards the ceiling. Keeping the shoulders and head on the floor, reach up and hold the strap one side in each hand. Pull back equally with each hand so both the pinkie and big toe sides of the foot are level to each other. Keep the right leg straight, without hyper-extending/locking the knee, even if that means the leg doesn’t get very close to the torso! Use the weight of the arms and begin to gradually pull the right leg back towards the torso. Push the left leg into the floor keeping the left knee and toes still pointing straight up towards the ceiling. Stay for 1-2 minutes. Other ways to do this pose:
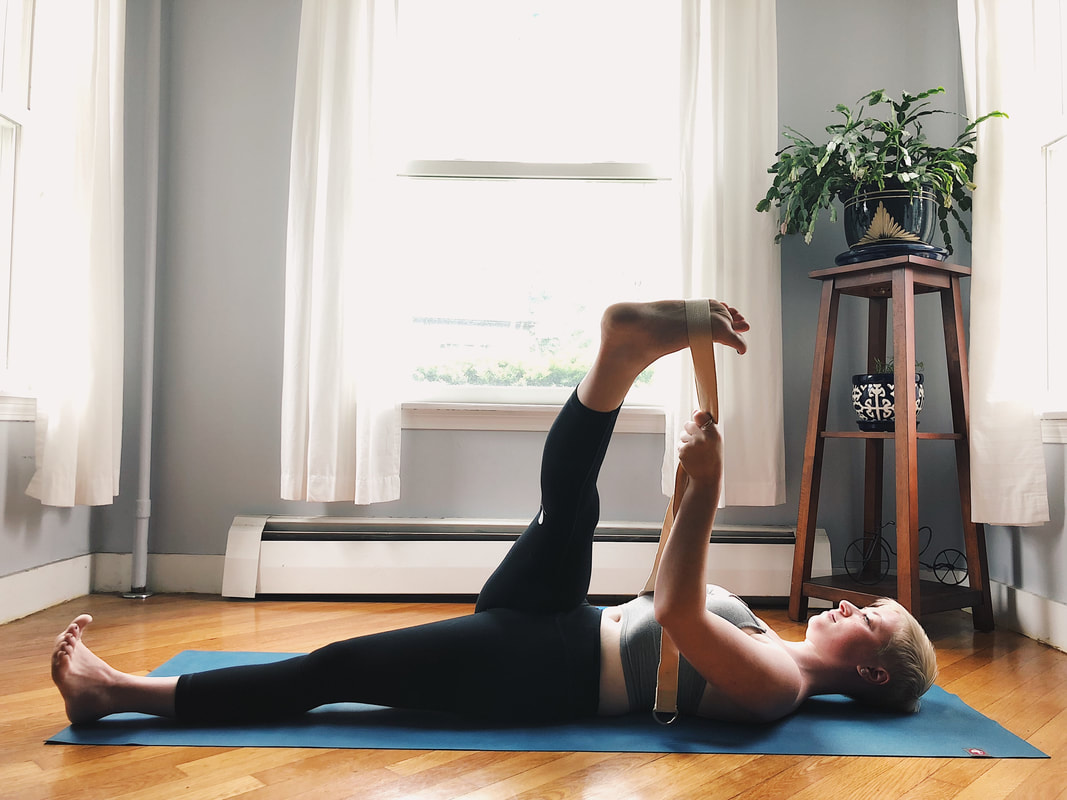 Photo by Omar Robinson Photo by Omar Robinson Supta Padangustasana 3 (Supine Hand to Big Toe Pose 3): * I know, I know - why go from Supta 1 to Supta 3, and not chronologically to 2? In this variation of Supta 3, it’s actually a closer segue! This pose moves the opening to the outer hamstring, IT band and glute muscles. Coming from Suptapadangustasana 1, pass both ends of the strap into the left hand and direct the right leg about 10 inches to the left. If you pictured your right leg on a clock-face, it’s going from your 12 O’Clock to your 10 O’Clock. It should be just enough of an angle that the right hip feels light on the floor, but not so light that it has lifted off of the floor and begun to twist over the left hip. Pull back on the pinkie toe side of the foot a bit more vigorously, as it will want to sickle away from the torso more than the big toe will. While keeping the right leg straight, direct the right hip towards the left heel and gradually encourage the right foot towards the left armpit. Stay 1-2 minutes. Other ways to do this pose:
Supta Padangustasana 2 (Supine Hand to Big Toe Pose 2): 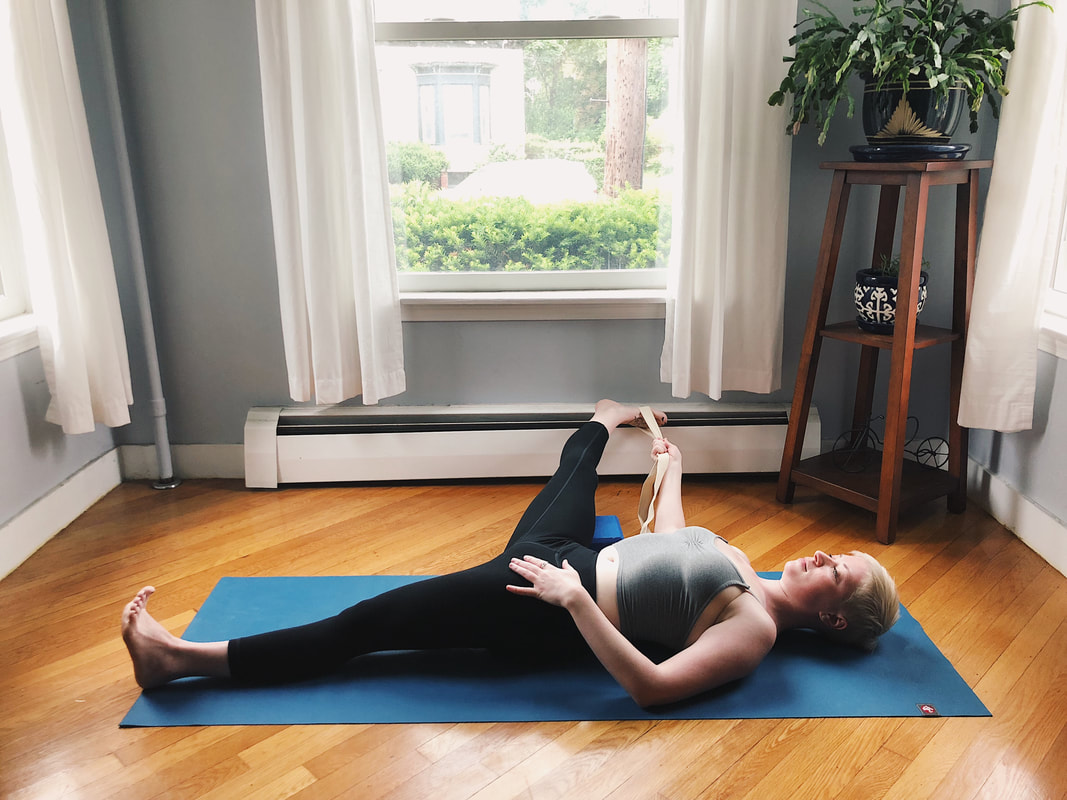 Photo by Omar Robinson  Photo by Omar Robinson * This shape moves the opening into the inner thigh/adductors and is potentially the most gravitationally difficult pose of the bunch, as such it's pictured with and without block support for aerial leg. Coming from Suptapadangustasana 3, draw the right leg back towards the midline, then pass both ends of the strap into the right hand. Press the left hand down onto the left hip to keep it stable, and use the right hand to guide the right leg up and over to the right into a straddle. Work to keep the right leg straight, direct the right outer hip towards the left legs heel and press the left thigh/hip down to keep the two halves of the hips parallel to the ceiling. Stay for 1-2 minutes. Other ways to do this pose:
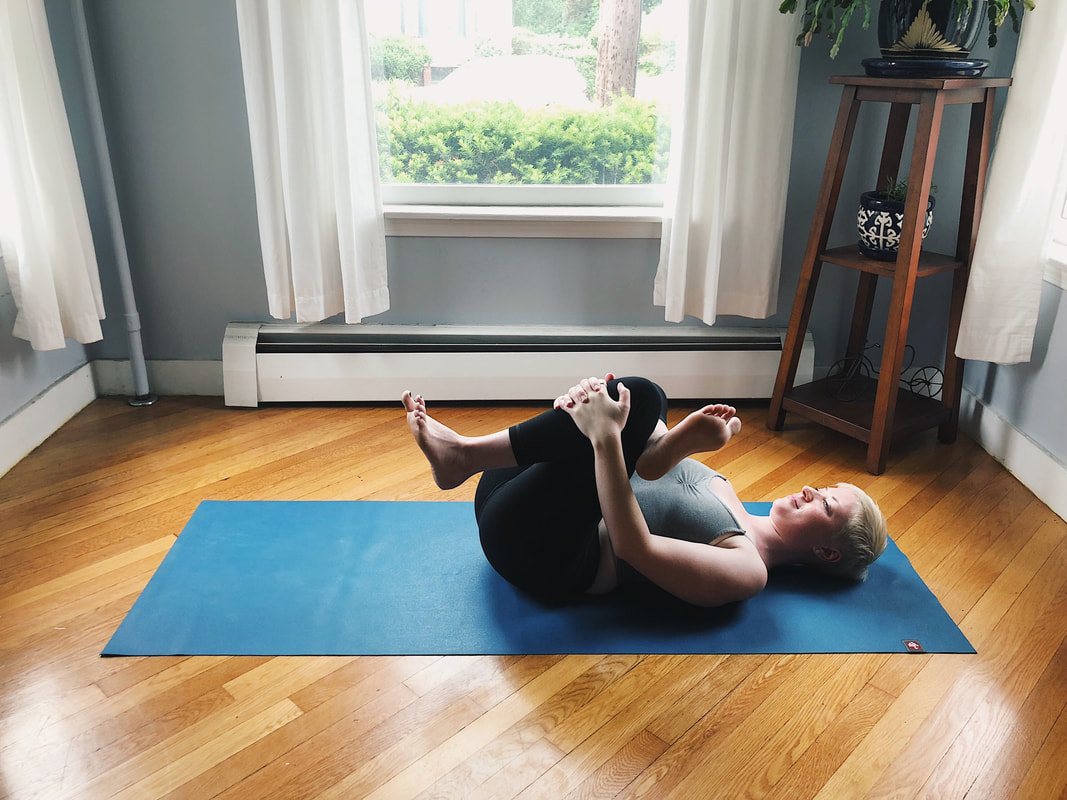 Photo by Omar Robinson Photo by Omar Robinson Figure 4: * This shape brings the opening back towards the outer hips, but usually a bit deeper into the back of the glutes/external rotators than Suptapadangustasana 3. This version is particularly useful for those with knee issues or low back injury/disfunction. From Suptapadangustasana 2, Draw right leg into midline and bend the left knee, stepping the left foot to the floor. Cross right ankle (just above the foot) over the left thigh. Right hand and arm thread in between the two thighs, left hand wraps around the left thigh and hands clasp behind left thigh or left shin. Use the clasped hands to pull the left leg closer to the left shoulder and resist the right knee away from the right shoulder. Stay 1-2 minutes. Other ways to do this pose:
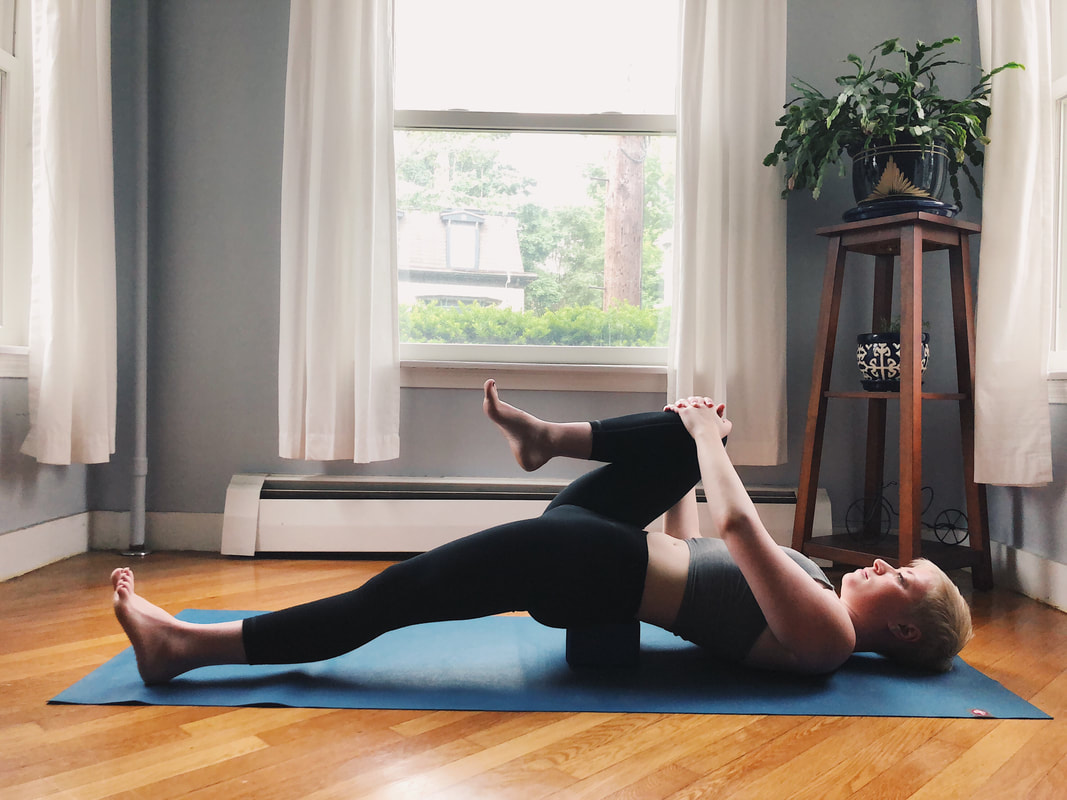 Photo by Omar Robinson Photo by Omar Robinson Supported Bridge:
* My students have heard me say this a thousand times: This is the MVP “most valuable pose” these days in my book. With the amount of sitting inherent in daily life, plus all of the propulsion we do (walking, running, cycling) the fronts of the hips are usually severely tight and there are very few passive positions that allow for lengthening these tight areas. Supported bridge is just the ticket! This is probably the pose that I use and give as homework the most right now. With a block nearby, set up laying on the floor, both knees bent. Feet and knees about as wide as the hips. Push into the feet to lift the hips and slide the block under the sacrum (a flat-ish triangular shaped set of fused vertebrae at the base of the spine, just above the tailbone.) Both knees can stay bent, or one leg can straighten and drop down towards the floor. To deepen perhaps the other leg bends and pulls back towards the torso. It is possible to straighten both legs in this pose, but be very mindful of the low back as it can get compressed in this position. Stay 1-2 minutes each side. Other ways to do this pose:
Repeat all poses on the left side and let me know how your journey around the world with your hips went!
0 Comments
|
Kate HeffernanYoga Teacher based in Boston, MA. Teacher of Yoga Teachers. Committed to teaching anatomical, alignment & action based yoga asana that is rooted in mindfulness, skillfulness, & specificity. Archives
March 2020
Categories
All
|
 RSS Feed
